Stereo mastering walkthrough involves the process of adjusting, equalizing, compressing, and adding effects to a final mix to enhance its quality. In the world of music production, mastering serves as the final stage of the production process, and it is a crucial part of creating high-quality audio.
The primary goal of mastering is to create a balanced and cohesive final product that translates well across various playback systems. It involves a detailed editing and polishing process to create a professional-sounding track. We will provide a step-by-step guide to stereo mastering.

Credit: www.masteringthemix.com
Preparing Your Mixes
Learn how to prepare your mixes for stereo mastering with our step-by-step walkthrough. Discover the essential steps in achieving a professional and polished sound for your music.
Preparing your mixes before sending them for mastering is an essential step in ensuring the final master sounds its best. It involves addressing common mix problems and fixing them before moving on to the next step. In this post, we will cover how to prepare your mixes for stereo mastering walkthrough.
Common Mix Problems
Before you start preparing your mixes, it is essential to understand common mix problems that need to be addressed. These issues include:
- Imbalanced frequency distribution
- Clipping and distortion
- Inconsistent levels
- Lack of depth and stereo width
- Poorly EQ’ed instruments
Fixing Mix Problems
Once you have identified the common mix issues, it’s time to fix them. Here are a few tips on how to fix these mix problems:
- Adjust EQ settings
- Use compression to even out levels
- Use panning to create a stereo image
- Apply corrective EQ to fix problem areas
- Remove unwanted noise and pops
Preparing Stems For Mastering
The next step is to prepare your stems for mastering. This involves exporting your mix elements as separate audio files to create a stem mix. It allows the mastering engineer to have more control over the final sound. Here are a few tips to follow while preparing your stems:
| Tip | Description |
|---|---|
| Consolidate your tracks | Ensure each audio file starts at the same point to avoid any timing issues. |
| Label your stems correctly | Include track names, bpm, and any other relevant information. |
| Export at the correct level | Aim to export at a peaking level of -6db to leave headroom for mastering. |
| Include both wet and dry stems | Include both processed and unprocessed stems to give the mastering engineer more flexibility. |
In conclusion, preparing your mixes for stereo mastering is a crucial step in ensuring the best possible final mix. By addressing common mix issues and preparing your stems correctly, you give the mastering engineer the tools they need to make your track sound its best.

Credit: www.masteringthemix.com
Mastering Tools And Techniques
Discover the art of stereo mastering with our comprehensive walkthrough of tools and techniques. Elevate your music production skills and achieve a professional sound with our expert guidance.
Mastering audio is the final stage of music production that involves refining the audio tracks to ensure the best possible sound quality. Stereo Mastering is walking through the finalizing process, and it involves several key mastering tools and techniques. The primary tools and techniques include equalization, compression, saturation, and limiting, which we will explore in detail in the following sections.
Equalization
Equalization, also referred to as EQ, is the process of adjusting the frequency balance of an audio signal. EQ enables an audio engineer to manipulate a track’s frequency balance by boosting or cutting specific frequencies to balance out the tone and create a clear and balanced mix. EQ tools help you achieve an overall tonal balance and can help with problem frequencies that detract from the clarity of a mix. To get the best results from EQ, it is essential to employ a combination of graphic and parametric equalizers.
Compression
Compression is the process of reducing the dynamic range of an audio signal to create a more consistent sound. A compressor helps bring the soft parts up and controls the loud parts, so the end result is more even in volume. By using a compressor, you can tame a track’s dynamic range, which can be helpful in making sure all of the instruments sit well together without any part popping out over others. The ratio, attack, and release settings of a compressor determine how it will affect a track’s sound.
Saturation
Saturation is a process of adding harmonic distortion to an audio signal, resulting in a warmer, richer, and more pleasing sound. Saturation generates pleasing harmonic distortion, though it can add some “noise.” Saturation mainly works to add harmonics to the material that lacks many. Overdrive and Distortion are forms of saturation that are misused if you desire a clean and polished mix. If used well, it can add a new dimension to a track’s sound, making it richer and more vibrant.
Limiting
Limiting is the process of imposing a ceiling on the maximum amplitude of an audio signal. The limit’s purpose is to prevent digital distortion from occurring in the final mix. A limiter works by controlling the peaks of the audio signal and ensures that they do not go beyond a certain level, typically -0.1 or -0.5Db. It helps to balance out the volume and increase the perceived loudness of the track without technical problems. It can be considered as “the last defense” you have against clipping, which can ruin a mix. These are the key tools and techniques involved in Stereo Mastering. By using these techniques, you can create a clear, balanced, and professional end product that translates well across a variety of listening environments.
Going Deeper With Mastering
If you are familiar with audio mastering, you will know that the process can significantly improve the sound quality of recorded music. However, if you want to take your mastering game to the next level, you need to dive into advanced techniques such as mid-side processing, parallel compression, and multiband compression. In this article, we will take a look at these techniques for going deeper with mastering.
Mid-side Processing
Mid-Side processing is a technique that allows you to manipulate the stereo image of a mix by separating the mid and side portions of the signal. The mid signal contains the sounds that are panned to the center of the stereo field, such as vocals and bass, while the side signal contains the sounds that are panned to the left or right, such as guitars and keyboards.
With mid-side processing, you can adjust the volume, EQ, and compression of the mid and side signals separately, allowing you to create a wider, fuller sound. For example, you can boost the bass and treble in the side signal to make the mix sound wider and more open, or compress the mid signal to make the vocals more prominent in the mix.
Parallel Compression
Parallel compression is a technique that involves blending a heavily compressed version of a mix with the original mix. This allows you to improve the consistency and impact of the mix without losing its dynamic range. To achieve this, you can create a parallel compression channel and route the original mix to it, then apply heavy compression and mix the compressed signal with the original signal.
Parallel compression can be particularly effective on drums and vocals, allowing you to bring out the subtleties and nuances of the performance while still maintaining a powerful, punchy sound. By adjusting the level and compression settings of the parallel compression channel, you can find the perfect balance between impact and clarity.
Multiband Compression
Multiband compression is a technique that allows you to compress different frequency bands separately, allowing you to control the dynamics of a mix more precisely. This can be useful for controlling the levels of individual instruments or elements within a mix, as well as improving the overall balance and clarity of the mix.
To use multiband compression, you first need to identify the different frequency bands of a mix and set up separate compression settings for each band. This allows you to apply more compression to the lower and mid frequencies, while leaving the higher frequencies relatively uncompressed. By adjusting the threshold, attack, and release of each band, you can fine-tune the dynamics of the mix.
With these advanced techniques in your mastering toolbox, you can take your mixes to the next level and achieve a more polished, professional sound.

Credit: www.youtube.com
Reference And A/bing
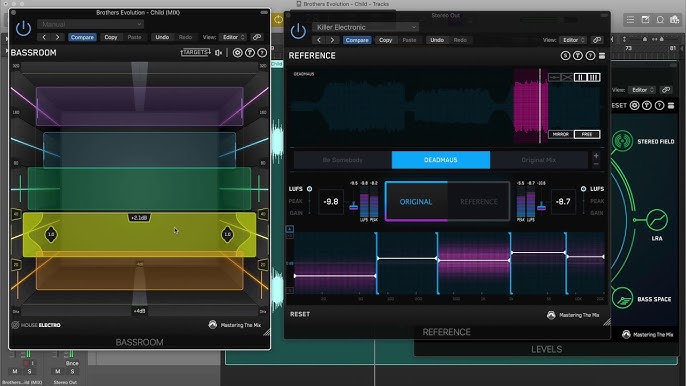
In stereo mastering, reference and A/Bing play a crucial role. By listening to a reference track and comparing it with the master, you can identify areas that need improvement. A/Bing allows you to switch between the original and mastered version in real-time, making it easier to make adjustments.
Stereo mastering is an essential process in the music production industry. It is where all the individual tracks of a mix get combined, and the final touches are added to the audio to make it ready for the public. Two essential processes in stereo mastering are reference and A/Bing. These processes help to ensure that the final master sounds as good as it possibly can.
Why Reference Is Important
Reference is crucial during stereo mastering because it helps to provide a clear benchmark for the final master. With a reference track, you can compare your master to professionally produced tracks and ensure that the final result is competitive in terms of loudness, dynamics, and tonal balance.
How To Use Reference Tracks
Using reference tracks is a straightforward process during stereo mastering. All you need to do is select a professionally produced track with a similar genre, instrumentation, and feel to your mix. Once you have the reference track, you can import it into your stereo mastering project and listen to it before and after you have applied your mastering chain to your mix. This way, you can ensure that your mix is of similar quality to that of the reference track.
How To Compare Your Mixes And Masters
Comparing mixes and masters during stereo mastering is crucial in ensuring that you achieve the best possible sound quality. A/Bing is a process that involves comparing multiple versions of a mix or master to establish which version sounds better. This process helps you to identify which version of your mix or master sounds the best and helps you to make the necessary adjustments. In conclusion, reference and A/Bing are two essential processes during stereo mastering. With reference tracks, you can ensure that your mix is of similar quality to professionally produced tracks, while A/Bing helps you to identify the best-sounding version of your mix or master. Use these processes to achieve the best possible sound quality for your final master.
Room Acoustics And Monitoring
Mastering a stereo track involves making fine adjustments to the overall tonality, dynamics, and spatial characteristics of the mix to enhance its overall impact and clarity. However, the success of the stereo mastering process depends heavily on the listening environment, which includes the room acoustics and the monitoring equipment. In this section of the stereo mastering walkthrough, we’ll focus on how to set up your listening environment, the importance of room acoustics, and selecting the right monitors.
How To Set Up Your Listening Environment
The first step in setting up your listening environment is to create an ideal listening position. Ideally, your speakers should form an equilateral triangle with your ears at the center. This means that the distance between the speakers should be the same as the distance between your ears and the speakers. You should also ensure that the speakers are facing straight towards your listening position and that they are not too close to walls or corners that could interfere with their sound.
The Importance Of Room Acoustics
Room acoustics play a crucial role in how you perceive sound in your listening environment. For instance, if your room has too many hard surfaces, such as walls, floors, and ceilings, sound can reflect off those surfaces and create echoes or reverberation that can affect your perception of the mix. Similarly, if your room has too many soft surfaces, such as carpets or curtains, sound can get absorbed, which can also affect your perception of the mix. To ensure the best possible acoustics, you can use sound-absorbing materials, such as diffusers and absorbers, to create a neutral listening environment.
Selecting The Right Monitors
Choosing the right monitors is essential for ensuring that you can hear the mix accurately and make the right adjustments. When selecting monitors, it’s essential to consider the size of your room and the type of music you’ll be mastering. In general, small monitors are better suited for smaller rooms, while larger monitors are better suited for larger rooms. It’s also important to choose monitors with a flat frequency response so that you can hear the mix accurately without any coloration or distortion.
Finalizing Your Master
Mastering your stereo tracks can make all the difference in achieving a professional sound. This step-by-step walkthrough covers the essential tools and techniques for finalizing your master, from setting limits and equalizing, to applying compression and adding stereo width.
Stereo mastering is an essential step in music production that optimizes the sound quality of your recordings. An expertly mastered song can make all the difference in the clarity, loudness, and overall impact of your music. The final mastering stage is where you prepare the master for distribution.
Preparing Your Master For Distribution
To prepare your master for distribution, you need to ensure that you have made all the necessary adjustments to your audio. This includes cleaning up any unwanted noises, adjusting levels of individual tracks, and applying dynamic range processing such as compression and limiting. Once this is done, you will need to listen to the track repeatedly to ensure that there are no artifacts or glitches.
Exporting The Final Master
Once you are satisfied with the quality and content of your master, it’s time to export the file. Exporting your final master is a crucial step as it determines the quality of the audio. You need to ensure that you select the appropriate bit-depth and sample-rate settings that match your target distribution platform. It’s also essential to select the appropriate file format, such as WAV, FLAC or MP3, depending on your preference.
Delivering Your Master To Clients
Delivering your master to clients is the final step, and you need to ensure that you follow proper delivery protocols. Determine the required file format, including bit-depth and sample-rate, and ensure that you have included any necessary metadata. Label the files correctly and organize them in appropriate folders. Ensure that the files are compressing into one manageable file, and included necessary notes or instructions with the delivery. In conclusion, preparing and finalizing your master is a crucial step in the music production process. Take extra care to ensure that the quality of your master is flawless, and you adhere to all delivery requirements. It’s essential to follow each step of the process carefully to guarantee the best possible outcome.
Frequently Asked Questions Of Stereo Mastering Walkthrough
What Are The Steps To Mastering A Song?
The steps to mastering a song involve equalization, compression, limiting, stereo enhancement, and dithering. Correct equalization involves effectively managing the tonal balance of the song. Compression reduces the dynamic range of the track, during which frequencies are reduced to equal levels resulting in a stable mix.
We can use limiting when we want to maintain a specific volume. With stereo enhancement, we can widen the soundstage. Lastly, dithering addresses the conversion of the audio into a compact form for playback.
Should I Master In Stereo?
It depends on your goals as a music producer. If you plan on mostly creating music for stereo playback, then mastering in stereo can be beneficial. However, if you plan on creating music for other formats such as surround sound or binaural, mastering in stereo may not be enough.
It’s important to consider your target audience and their preferred listening format.
What Is The Difference Between Stem Mastering And Stereo Mastering?
Stem mastering involves processing groups of instrument tracks separately before mixing them down into a stereo mix. Stereo mastering is the final processing of the stereo mix. The main difference is that stem mastering allows for more control over the separate elements in a mix, while stereo mastering is focused on the overall balance and enhancement of the stereo mix.
Should Stems Be Mono Or Stereo?
Stems can be either mono or stereo, depending on the intended use and the specific project requirements. Mono stems are typically used for audio recordings where the focus is on the individual elements, while stereo stems are used for a more immersive experience that gives a broader and more dynamic soundstage.
Conclusion
Mastering may seem like an intimidating process, but with the right techniques and tools, anyone can achieve professional-sounding results. Remember to give your ears a break and come back to your mix with fresh ears. Utilize EQ to balance and shape the sound, compressors to control the dynamics, and limiters to prevent clipping.
As with any skill, practice makes perfect, so keep honing your mastering skills and you’ll be amazed at the results you can achieve. Happy mastering!